
Ok, I have been procrastinating this for too enough now (actually since the first performance on the 11th of november, urk) and if I continue to do so the next project will already be finished so… let’s go!

First, the spiel introduction:
Sometime in summer 2016, the Trier English Drama Group, directed by my parents, read Jessica Swales’ adaptation of Sense and Sensibility. I had already decided that I needed to make costumes but never thought I wanted to act. Little did I know!
During the reading I had to take the part of Margaret, the younger sister, and quickly fell in love with it. And we all fell in love with the play, so it was a deal. Somehow we had nobody for the part of Miss Grey so I ended up with two parts. Ooops…
But now, onto the costumes! I was so fascinated by all the possibilities that I started planning out everything before the play was even decided but I just couldn’t help myself! Well in the end it turned out that I had taken on too much (as always: several dresses for some of the ladies, breeches for every gentleman, waistcoats etc.) so a lot of them were cancelled due to a lack of time (or motivation ahem).

Concept
This is an extract from the article I wrote for the programme:
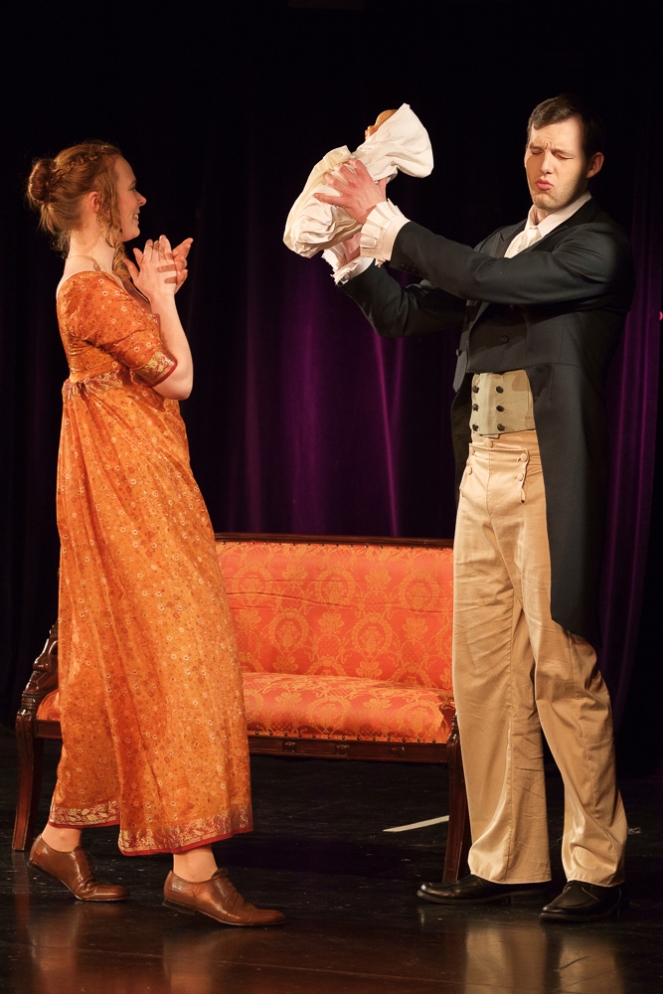
“When developing the overall concept of the production, I first decided on a color scheme. My choice to go with colors from red, orange and brown over cream and yellow to green for the women’s clothes was mainly caused by the image of warm and lively country life I had in mind while reading the play for the first time. In addition to that, it was clear from the start that the set would be quite practical with little furniture because of the many scene changes and would have a black background, so it was important to use bright colours in order to create a contrast and make it visually pleasing. The pastel fabrics that were used for the first dresses of the sisters are the only ones that were not made out of saris but from fabrics I actually had in my stash, they look a bit more juvenile which captures the sister’s naivety in the beginning quite well. Men’s tailcoats are generally a bit darker, bit I still tried to avoid cold colors.

As affordable fabrics with appropriate patterns were not easy to aquire by the metre and there was no time to decorate them (e. g. with embroidery), the idea of using vintage saris came to my mind. Saris are traditional garments from India that are originally draped elegantly around the hips an over one shoulder of the wearer. These cotton or silk rectangles normally measure 5m length and 1,1m width and are sometimes elaborately decorated. During the 19th century when India was a colony of Britain they were highly demanded by European ladies and recycled for clothes in the European style.”

Well sadly I couldn’t use all of them but I got to keep the rest as a reward for my work so who am I to complain? It was also my first time working with real silk fabrics. Let me say this: Saris are AWESOME for historical dresses! They were not expensive at all and had beautiful patterns. Some were polyester but still looked great on stage. Whenever possible, I incorporated the border into the dress – more details but little work. If a sari isn’t wide enough, add another strip of border to the hem, iron well and nobody will notice. This should work if the hem circumference is not higher than half of the sari length minus the pallu. For my dresses it was only 2 meters, so no problem.

Patterns and Sewing
Please note that I was not trying to make period accurate garments but theatrical costumes, so a lot of things were simplified!
I started by making the theatrical version of the Laughing Moon Mercantile #115 Ladies Regency and Romantic Era Corset for each of the 8 ladies. It was my first time working with Laughing Moon Patterns and it went together really well. The instructions are clear and there are lots of pictures and very informative background information so even someone like me who had never made a corset or stays before was able to do it. So 8 patterns, 8 mock-ups and 8 stays. The busks were selfmade out of a wooden strip from the DIY-Store by cutting it into pieces ot the required length and sanding the edges. This worked surprisingly well, I can only recommend it for everyone who is searching for a cheap solution to make a busk.

For the dresses, I used the Regency Wardrobe by La Mode Bagatelle. In my opinion it is a very good pattern that provides lots of options if you are willing to be creative. Especially the View D is useful, almost every dress was made using this pattern. I also did the View G Spencer Jacket for myself, but messed up with the fitting so I couldn’t close it in the end :’D Luckily this wasn’t the case for the open pelisse (is it called that way?). I just left out the center front part, added stips of fabric on which I sewed buttons and used a long rectangle in place of the waistband.

The chemisette also worked well, it is just a bit tight around the neck. That’s why the buttons are fake, it closes by snap fastener on the inside.

Furthermore, I bought Simplicity 4055 but only used it for one dress (View A). This one is also a very beautiful pattern, the bust part is a bit longer than the one from the Regency Wardrobe. I especially adore the sleeves, they have just the right amount of volume!

Making the bonnets was one of my favourite things! Using a method found on the internet, I cut away the back part of Ikea straw hats and decorated them with flowers and ribbons.


Now the men’s clothes were something else. While the women’s clothes were all made by me without exception, sewing that many tailcoats would have been too much work. So I did the following:
- Just reusing random coats from older productions (horribly inaccurate)
- Altering modern coats by cutting away the front (less horrible but still)
- I sewed ONE only one and it was horrible (well it looked good but turned out to be a torture)
For the one that was entirely selfmade Laughing Moon 122 Men’s Empire and Regency Tailcoat was by my side and helped me, but a lot of time will have to pass before I do that again. At least suffering through 18 hours paid off.

Laughing Moon also served as the supplier for the breeches pattern, which is #127 Men’s Narrow Fall Breeches. The shirt pattern is Kannik’s Korner Men’s Shirt. My mother made a few of them to help me (the good soul!). It runs VERY large but looking at originals, that seems to be intended.
I also had the honour to sew a uniform for the colonel. I ADORE Uniforms! But it became a victim to my lack of time and had to be done in the night before the first performance, so no epaulettes 😦 He still looks marvellous. The pattern is Rocking Horse Farm 1812 Dragoon Uniform with alterations.

Gosh was that all? I think so. According to my calculations I spent more than 170 hours on this project. At times I just wanted to stop it all (especially during the 6 weeks of the summer holidays, my biggest motivation crisis) but the thought of how it would look on stage kept me going. And of couse, the result was worth all the work. I am so glad to have been part of this amazing production with a group of lovely weirdos! It will definitely not be the last time.
Hopefully you have enjoyed this (very long) post and the pictures. Thank you for reading!
Stage photos are by Tom Klein
The photos of the bonnets are mine
